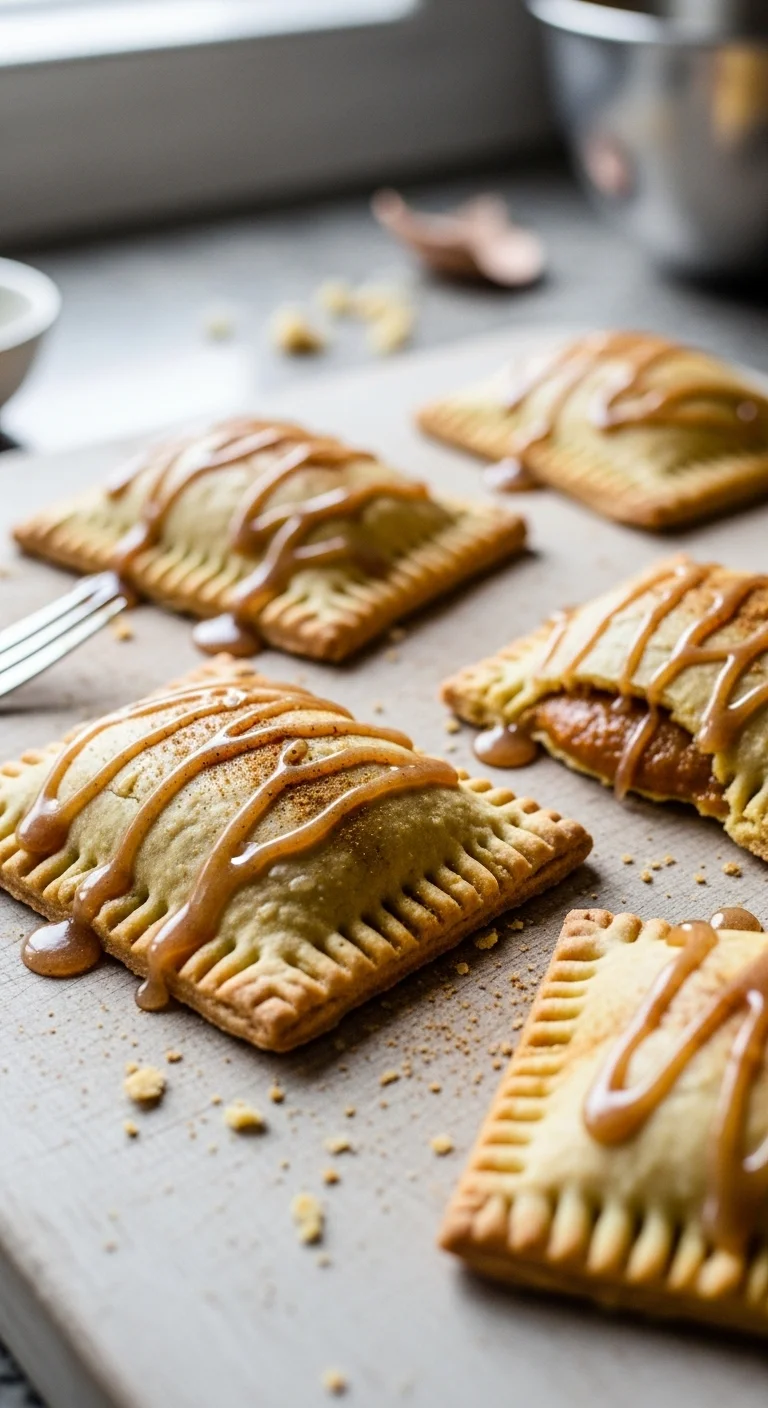
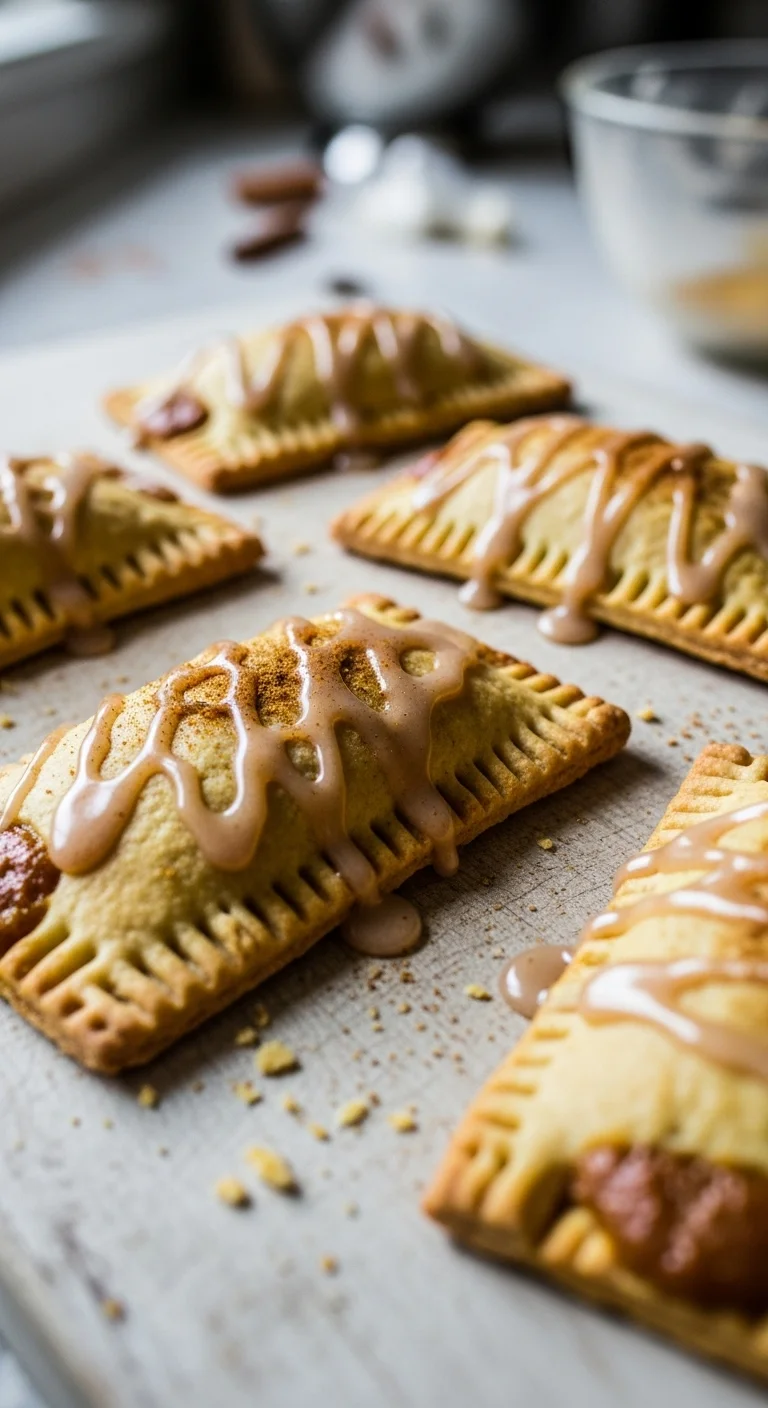
Fall is in the air, and what better way to celebrate than with a batch of warm, homemade pumpkin pop tarts? Forget the store-bought version – these are on a whole other level. Imagine sinking your teeth into a buttery, flaky crust filled with a spiced pumpkin dream, all topped with a sweet, glossy maple glaze. This isn’t just a recipe; it’s an experience, a journey into autumn flavors, and a guaranteed crowd-pleaser. Get ready to transform your kitchen into a pastry paradise with this easy-to-follow recipe that will have everyone begging for more.
Why This Pumpkin Pop Tarts Recipe Will Change Your Life
Let’s be honest, store-bought pastries often leave something to be desired. They’re usually overly sweet, loaded with preservatives, and just lack that homemade touch. This pumpkin pop tarts recipe is a game-changer because it puts you in control. You get to choose the quality of ingredients, customize the sweetness, and experience the sheer satisfaction of creating something incredible from scratch.
Beyond the taste, making these pop tarts is a therapeutic activity, a way to slow down, connect with your senses, and create a little magic in your kitchen. The aroma alone, as the pumpkin spice fills the air, is enough to transport you to a cozy fall afternoon. And the best part? You’ll have a batch of warm, delicious treats that are far superior to anything you can buy in a store. These are the memories that will last long after the last bite.
I remember the first time I made these. I was trying to impress my friends, and I was so nervous. But as I followed the recipe, the dough came together beautifully, the pumpkin filling smelled divine, and the glaze turned out perfectly glossy.
When my friends tasted them, their eyes lit up! The compliments and the smiles made all the effort worthwhile. And that’s what I want for you too. With this recipe, you’ll have the confidence to bake something truly special. These pumpkin pop tarts aren’t just a dessert; they’re a symbol of warmth, comfort, and homemade goodness that will bring joy to everyone who tries them.
The Secret Techniques That Make This Pumpkin Pop Tarts Perfect
While this recipe is straightforward, a few key techniques can elevate your pumpkin pop tarts from good to extraordinary. The first secret lies in the butter – make sure it’s incredibly cold. Cold butter creates those beautiful, flaky layers that make a shortcrust pastry so delightful. Think of it like tiny butter pockets that steam in the oven, creating air and lift.
Secondly, don’t overwork the dough. Overmixing develops the gluten, leading to a tough pastry. A light hand is key. Just mix until the dough comes together, then let the fridge do its work.
Lastly, and this is crucial, use the right amount of ice water. Too much, and your dough will be sticky; too little, and it will be dry and crumbly. Add it gradually, a tablespoon at a time, until the dough just starts to hold together. These simple techniques will guarantee perfect pumpkin pop tarts every time.
Another trick I’ve learned is to prick the tops of the pop tarts with a fork before baking. This allows steam to escape and prevents the pastries from puffing up too much and bursting open. It also creates a prettier, more even surface for the glaze. Also, don’t be afraid to experiment with the filling.
While this recipe calls for maple syrup, you could use brown sugar or even a touch of molasses for a richer, deeper flavor. Finally, remember to cool the pop tarts completely before glazing. This prevents the glaze from melting and running off. These are the details that separate a good recipe from a great one, and they’re all within your reach!
Pumpkin Pop Tarts: Homemade & Delicious
Make these buttery, flakey homemade pumpkin pop tarts! Filled with sweet pumpkin & topped with a maple glaze. Perfect for fall baking. Get the recipe!
🍎 Nutrition Information
🥘 Ingredients
👨🍳 Instructions
-
Sift together flour, sugar, pumpkin spice.
-
Add cold, cubed dairy-free butter and mix until sandy.
-
Add ice water until dough comes together.
-
Combine pumpkin puree, maple syrup, pumpkin spice, and corns
-
Whisk together icing sugar, maple syrup, pumpkin puree, pump
-
Roll out pastry between floured greaseproof paper.
-
Cut out pumpkin shapes.
-
Add filling to half of the pastry shapes.
-
Cover with another shape and seal edges with fork.
-
Brush with dairy-free milk.
-
Bake at 180°C (fan) for 15-20 minutes.
-
Cool before glazing.
-
Drizzle glaze on top and sprinkle with pumpkin spice (option
📝 Notes & Tips
Keep butter very cold for flaky pastry. Prick tops with fork before baking to prevent bursting.
Essential Ingredients: What Makes Each One Special
Every ingredient in these pumpkin pop tarts plays a crucial role in the final result. Let’s start with the flour. All-purpose flour is a versatile choice, but you can also use gluten-free flour for a gluten-free version. Just be sure to add a binder like xanthan gum to improve the texture.
Next, the dairy-free block butter. This is what gives the pastry its richness and flakiness. Make sure it’s cold and cut into small cubes for easy mixing. For the pumpkin pie filling, pumpkin puree is the star of the show, and maple syrup adds a touch of natural sweetness.
Cornstarch helps to thicken the filling and prevent it from being too runny. And last but not least, the pumpkin spice blend ties everything together with its warm, aromatic notes. The glaze is just icing sugar, maple syrup, pumpkin puree, pumpkin spice and a splash of dairy-free milk. High quality ingredients equals high quality pastry!
The type of maple syrup you use will also affect the flavor. A dark amber maple syrup will give the glaze a richer, more intense flavor, while a lighter syrup will be more delicate. I personally love using a good quality maple syrup for both the filling and the glaze, as it really brings out the pumpkin flavor. You could even add a pinch of salt to the pumpkin filling to balance the sweetness and enhance the other flavors.
Step-by-Step Mastery: Pro Techniques for Success
Let’s break down the recipe into manageable steps, focusing on pro techniques for guaranteed success. First, for the pastry: start by sifting together the flour, sugar, and pumpkin spice in a medium-sized mixing bowl. This ensures that the ingredients are evenly distributed and prevents lumps from forming. Add in the cold, cubed dairy-free butter and mix until it resembles sand.
You can use your fingertips, a pastry blender, or a food processor for this step. The key is to work quickly and keep the butter cold. Next, add in the ice water a half tablespoon at a time until the dough comes together. Be careful not to overmix.
Now, for the pumpkin filling: in a medium-sized mixing bowl, combine the pumpkin puree, pumpkin spice, maple syrup, and cornstarch. Mix until fully combined. This step is quick and easy, but it’s important to ensure that the cornstarch is fully dissolved to prevent a grainy texture. For the glaze: whisk together the icing sugar, maple syrup, pumpkin puree, and pumpkin spice until thick.
If it’s too thick, add a splash of dairy-free milk. If it’s too runny, add more powdered sugar. The perfect consistency should be like toothpaste. Once the pastry is chilled, roll it out between two sheets of floured greaseproof paper until it’s a large rectangle.
Use a pumpkin-shaped cookie cutter to cut out the shapes. Add a teaspoon amount of the filling to the middle of half of the pastry pumpkin shapes, and make sure there’s about 1/3 inch open space around the edge of your pastries. Place another pumpkin shape over the filling and use your finger to press down the edges, then press together with a fork to seal. Brush the tops with dairy-free milk and bake in a preheated oven at 180°C (fan) for 15-20 minutes, or until lightly golden brown.
Allow to cool before glazing. Add a drizzle of glaze on top of the cooled pop tarts and sprinkle with pumpkin spice and sugar (optional). Let the glaze set before serving. Enjoy the delicious pastry!
Creative Variations: Make It Your Own
One of the best things about homemade pastries is the opportunity to customize them to your liking. Feel free to add different spices to the pumpkin filling, such as ginger, nutmeg, or cloves. For a chocolatey twist, add a tablespoon of cocoa powder to the pastry dough or drizzle melted chocolate over the glaze. You could also experiment with different toppings, such as chopped nuts, sprinkles, or a dusting of cinnamon sugar.
Or, for a savoury variation, use a different filling altogether, such as apple butter or cranberry sauce. The possibilities are endless! You can also change up the glaze by adding a little lemon juice for a tangy flavor, or by using brown sugar instead of maple syrup for a caramel-like glaze. And if you’re feeling adventurous, try making a double batch of the pastry dough and using half for sweet pop tarts and half for savoury ones. The key is to have fun and let your creativity shine!
I once made these pumpkin pop tarts with a gingerbread twist for a holiday party. I added a teaspoon of ground ginger and a pinch of black pepper to the pumpkin filling, and used a gingerbread man cookie cutter instead of a pumpkin. They were a huge hit! Another time, I made a batch with a salted caramel glaze by adding a pinch of sea salt to the maple glaze. The salty-sweet combination was absolutely divine.
So don’t be afraid to get creative and experiment with different flavors and shapes. These pumpkin pop tarts are a blank canvas just waiting for your personal touch. You can also explore other fillings such as homemade jam, or a crumble topping.
Perfect Pairings: What to Serve With Pumpkin Pop Tarts
While these pumpkin pop tarts are delicious on their own, they can be even more enjoyable when paired with the right accompaniments. For a cozy fall breakfast, serve them with a warm cup of coffee or tea. The warm, spiced flavors of the pop tarts complement the richness of the coffee or the subtle notes of the tea perfectly. For a dessert, pair them with a scoop of dairy-free vanilla ice cream or a dollop of whipped cream.
The creamy texture of the ice cream or whipped cream contrasts beautifully with the flaky pastry and the spiced pumpkin filling. Or, for a more sophisticated pairing, serve them with a glass of dessert wine, such as a Moscato or a Riesling. The sweet, fruity notes of the wine complement the sweetness of the pop tarts without being overpowering. You could even crumble a pop tart over your morning granola to add a touch of autumn spice.
For a fun twist, try serving these pumpkin pop tarts with a homemade pumpkin spice latte. The combination of the warm, spiced drink and the pastry is the ultimate fall indulgence. You could also serve them as part of a fall-themed brunch, alongside other seasonal treats such as apple cider donuts or cinnamon rolls. Or, for a lighter option, pair them with a fruit salad or a yogurt parfait. And if you’re looking for a more savoury pairing, try serving them with a slice of cheese. The sharp, salty flavor of the cheese contrasts nicely with the sweetness of the pop tarts. The possibilities are endless! Vegan Apple Crumble would be great also!
Storage Secrets: Keep It Fresh and Delicious
To keep your pumpkin pop tarts fresh and delicious for as long as possible, proper storage is essential. Once they’re completely cooled, store them in an airtight container at room temperature. They’ll stay fresh for up to 3 days. To prevent them from becoming soggy, avoid storing them in the refrigerator.
If you want to keep them for longer, you can freeze them. Wrap each pop tart individually in greaseproof paper and then place them in a freezer-safe container. They’ll stay fresh in the freezer for up to 2 months. To thaw, simply remove them from the freezer and let them sit at room temperature for a few hours.
If you find that your pop tarts are starting to dry out, you can revive them by brushing them with a little maple syrup or dairy-free milk and reheating them in the oven. This will help to restore their moisture and bring back their delicious flavor. You can also store the unglazed pop tarts in the freezer and glaze them just before serving. This will prevent the glaze from cracking or becoming sticky. And if you have any leftover pastry dough, you can wrap it tightly in greaseproof paper and store it in the refrigerator for up to 2 days, or in the freezer for up to 1 month. Maybe you could try Vegan Chocolate Chip Cookies next time!
Health Benefits: Why This Pumpkin Pop Tarts is Good for You
While these pumpkin pop tarts are undoubtedly a treat, they also offer some surprising health benefits. Pumpkin is packed with vitamins and minerals, including vitamin A, vitamin C, and potassium. It’s also a good source of fiber, which aids digestion and helps you feel full and satisfied. Maple syrup, while still a sweetener, is a more natural option than refined sugar and contains antioxidants and minerals.
Pumpkin spice blend also has health benefits, as cinnamon, nutmeg, and ginger have anti-inflammatory and antioxidant properties. Plus, making these pop tarts from scratch means you can control the ingredients and avoid artificial additives and preservatives. While they should still be enjoyed in moderation, these pumpkin pop tarts are a healthier alternative to store-bought pastries and a delicious way to incorporate more nutrients into your diet.
Since this recipe is vegan, it also has the added benefit of being cholesterol-free and lower in saturated fat than traditional pastries. Using dairy-free butter helps reduce your intake of saturated fats, which are linked to heart disease. And by using pumpkin puree, you’re adding a good source of beta-carotene to your diet, which is converted into vitamin A in the body and is important for eye health and immune function. So while these pumpkin pop tarts are a treat, they’re also a way to nourish your body with wholesome ingredients.
Troubleshooting: Fix Common Mistakes
Even the most experienced bakers encounter occasional problems. Here are some common issues and how to fix them. If your pastry dough is too dry, add a little more ice water, a tablespoon at a time, until it comes together. If it’s too sticky, add a little more flour.
If your pumpkin filling is too runny, add a little more cornstarch. If your glaze is too thick, add a splash of dairy-free milk. If it’s too thin, add more icing sugar. If your pop tarts are browning too quickly, lower the oven temperature and cover them with foil.
If they’re not browning enough, increase the oven temperature slightly. And if they’re sticking to the baking sheet, make sure you’ve lined it with greaseproof paper. With a little patience and these troubleshooting tips, you can overcome any obstacle and achieve pastry perfection. The pastry might be over worked or not chilled, make sure you keep the ingredients cool.
Another common mistake is overbaking the pop tarts, which can result in a dry, hard pastry. To prevent this, keep a close eye on them while they’re in the oven and remove them as soon as they turn lightly golden brown. You can also use an oven thermometer to ensure that your oven is heating accurately. If your pop tarts are cracking during baking, it could be because the dough is too dry or because the oven is too hot.
Try adding a little more ice water to the dough and lowering the oven temperature. And if your glaze is turning out streaky, it could be because it’s too thick or because the pop tarts are too warm. Try adding a little more dairy-free milk to the glaze and cooling the pop tarts completely before glazing. Remember, baking is a science, but it’s also an art.
Expert Answers: Your Burning Questions
Here are some frequently asked questions about making pumpkin pop tarts: Can I use a different type of flour? Yes, you can use gluten-free flour, whole wheat flour, or even a combination of flours. Just be sure to adjust the liquid accordingly. Can I use a different type of sweetener? Yes, you can use brown sugar, agave nectar, or any other sweetener you prefer. Can I make these ahead of time? Yes, you can make the pastry dough and the pumpkin filling ahead of time and store them in the refrigerator.
You can also assemble the pop tarts and freeze them before baking. Can I reheat these? Yes, you can reheat them in the oven, toaster, or microwave. Can I make these without a cookie cutter? Yes, you can simply cut the pastry into squares or rectangles using a knife or pizza cutter. These are some of the most common queries, I hope these answer your questions!
Also, if you want to know about the best way to cool the pastry, let it cool on a cooling rack, so the air can circulate. Or you might be asking if its possible to air fry the pastries? Yes, you can preheat your air fryer to 180C, and cook the pastries for 8-10 minutes. Another great question, can I make a larger batch of the recipe? Of course you can, just double the ingredients! Also, be sure to check out my Chocolate Cupcakes to satisfy that sweet tooth!
More Amazing Recipes You’ll Love
If you enjoyed this pumpkin pop tarts recipe, here are a few more recipes you might like:
- Vegan Apple Crumble: Warm, comforting, and perfect for fall. Vegan Apple Crumble
- Vegan Chocolate Chip Cookies: A classic treat that’s always a crowd-pleaser. Vegan Chocolate Chip Cookies
- Vegan Banana Bread: Moist, delicious, and perfect for using up ripe bananas. Vegan Banana Bread Recipe
- Vegan Pancakes: Fluffy, light, and perfect for a weekend breakfast. Vegan Pancakes
- Chocolate Cupcakes: Rich, decadent, and perfect for any celebration. Chocolate Cupcakes
- Vegan Brownies: Chewy, fudgy, and packed with chocolate flavor. Vegan Brownies
I hope you enjoy these recipes as much as I do! Be sure to subscribe to my newsletter for more delicious recipes and baking tips. And don’t forget to follow me on social media to stay up-to-date on my latest creations. Happy baking, everyone! These pastries are perfect for enjoying with loved ones, especially in the fall!