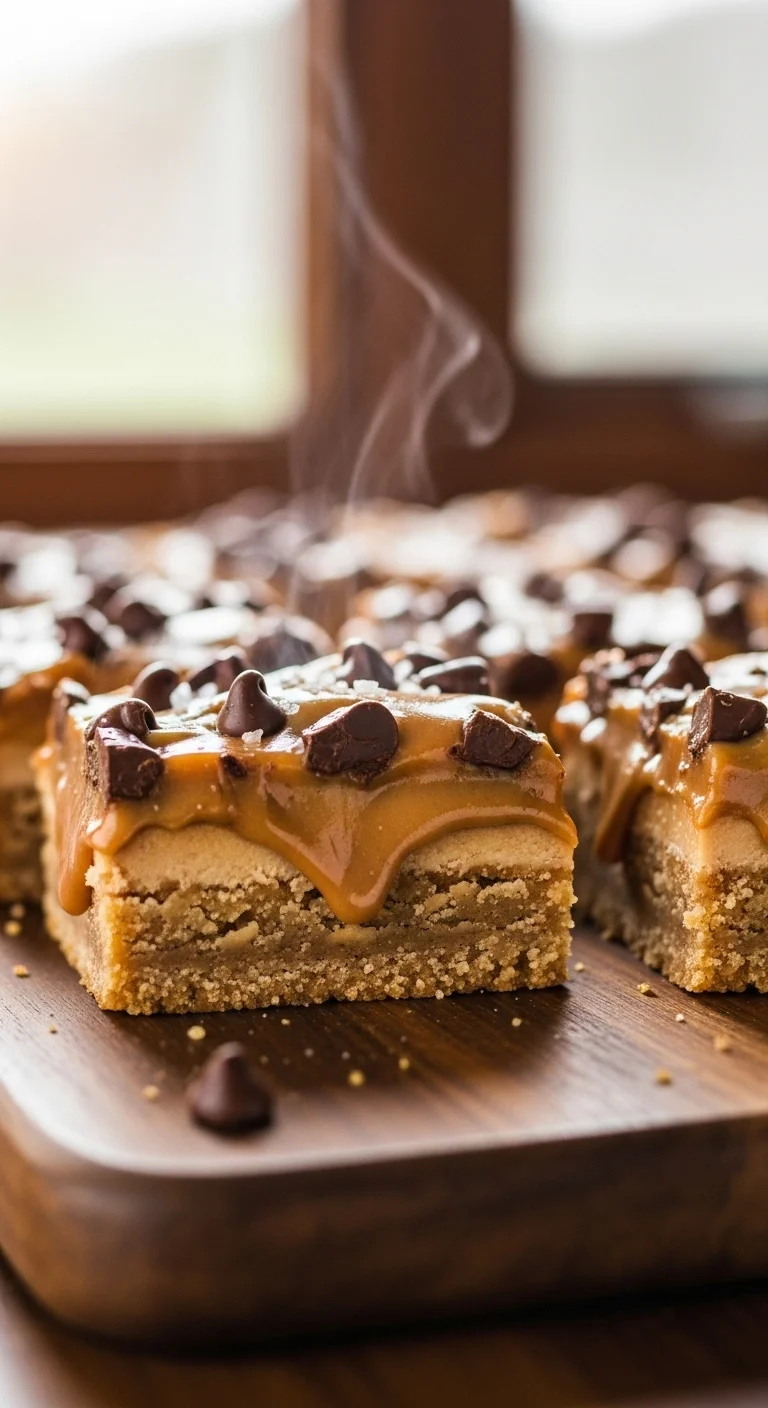
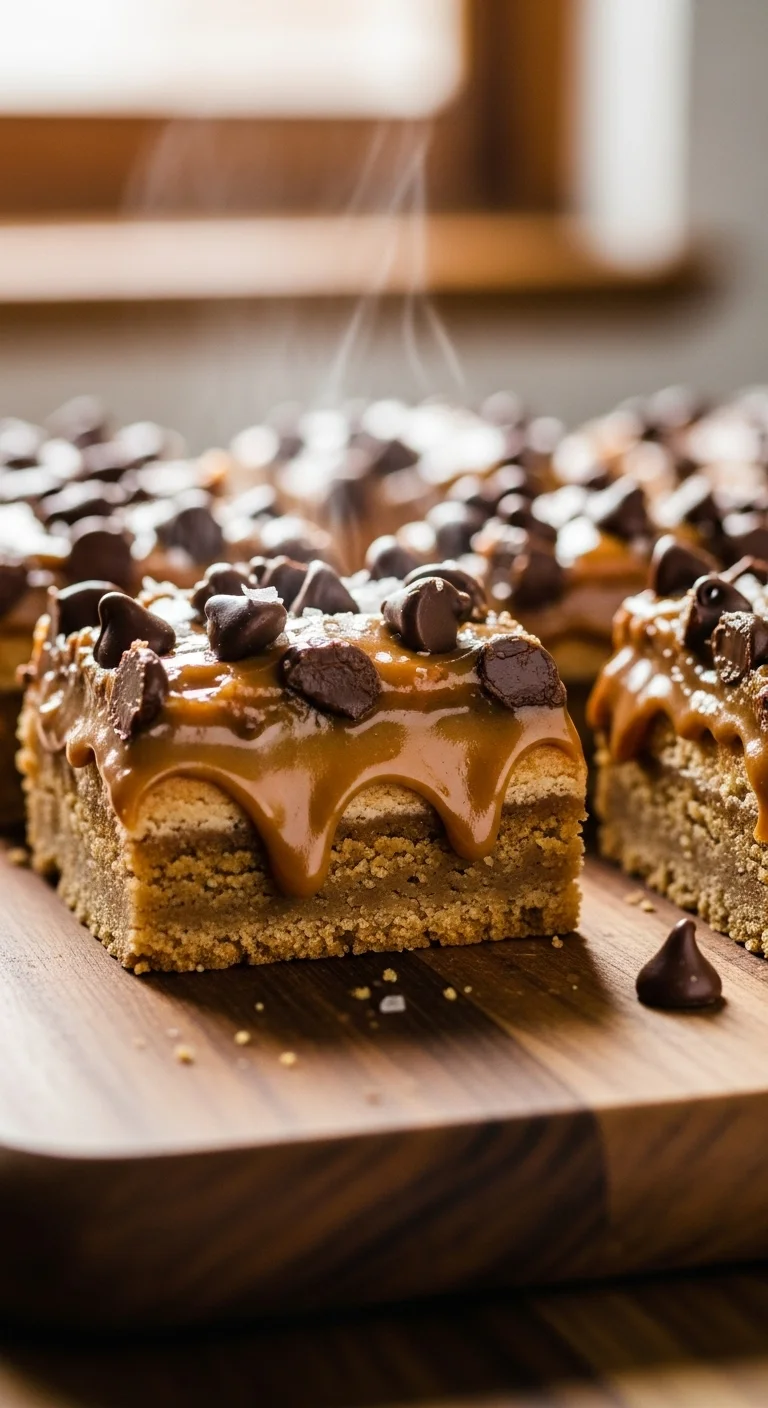
Okay, friends, let’s talk dessert. Not just any dessert, but a dessert so outrageously good, so undeniably decadent, that it’s practically illegal. I’m talking about Better Than Anything Bars. Imagine this: a buttery, crumbly cookie base, oozing with a caramel-peanut butter dream, topped with a blanket of melting chocolate. Yeah, you read that right. This isn’t just a recipe; it’s a culinary masterpiece, a symphony of sweetness that will have everyone begging for more. I first made these for a potluck back in college (many years ago!). I was a nervous cook back then, always worried about impressing people. Let me tell you, these bars were a hit. People were practically fighting over the last piece. That’s when I knew I had a winner, a go-to recipe that I could always rely on to wow a crowd. And today, I’m sharing it with you. Get ready to bake something truly extraordinary. From my kitchen at RecipesWithClara to yours, let’s make some magic!
Why This Better Than Anything Bars Recipe Will Change Your Life
Alright, “change your life” might sound dramatic, but hear me out. These better than anything bars aren’t just about the taste (though that’s a huge part of it). It’s about the experience. These are the kinds of bars that evoke memories of childhood, of grandma’s kitchen, of pure, unadulterated joy. They’re a guaranteed crowd-pleaser, perfect for any occasion, from bake sales to birthday parties. Plus, this recipe is incredibly forgiving. Even if you’re a beginner baker, you can nail this. And let’s face it, sometimes we all need a little comfort food in our lives. A little indulgence to brighten up a cloudy day. These bars are that comfort food, elevated to an art form. I’ve tweaked and perfected this recipe over the years, adding my own little secrets and techniques to ensure that every bite is pure bliss. I promise you, once you make these dessert bars, you’ll never look at another dessert the same way. They’re that good. They’re that unforgettable. Seriously, prepare for an influx of compliments. You’ll be the dessert hero of your family, your workplace, maybe even your entire town! These truly are better than anything bars, and they will be your secret weapon when you need to impress.
And because these chocolate peanut butter bars are so easy to make, you’ll always have a delicious option when that last-minute party invitation arrives! Trust me, you’ll be so glad you have this recipe up your sleeve. The best part is watching the smiles and hearing the “mmm”s as everyone enjoys these sweet treats. They are also perfect for sharing at holiday gatherings. Imagine bringing a pan of these to your next Thanksgiving or Christmas party. They’ll be gone in minutes! Plus, these caramel bars travel well, making them ideal for picnics and potlucks.
The Secret Techniques That Make This Better Than Anything Bars Perfect
So, what’s the secret to making truly exceptional better than anything bars? It’s all about the details. First, don’t skimp on the butter. Use real, high-quality butter for the cookie base. It makes a huge difference in the texture and flavor. Second, make sure your butter is properly softened. Not melted, not rock-hard, but perfectly soft to the touch. This will ensure that your cookie dough is light and fluffy. Third, don’t overmix the dough. Overmixing can lead to tough bars. Mix until just combined, and then fold in the chocolate chips. For the caramel layer, use individually wrapped caramels. They melt more evenly than caramel squares. And don’t be afraid to experiment with different types of chocolate chips. Dark chocolate, semi-sweet, milk chocolate – they all work beautifully. I even love using a combination of milk chocolate and white chocolate chips for an extra touch of sweetness. Another secret? A pinch of sea salt sprinkled on top after baking enhances all the other flavors. These little tweaks create dessert bars that stand out from the crowd. Finally, patience is key. Let the bars cool completely before slicing. This will prevent the caramel from oozing everywhere and ensure that you get clean, even cuts. These bars, made with love, are truly better than anything bars you’ll ever eat.
One other technique I swear by is using a preheated oven and a high-quality baking pan. An even temperature throughout baking is key, and a good pan will distribute the heat evenly, resulting in a perfectly baked bottom crust. These small improvements will result in better than anything bars that are to die for. Also, line the pan with parchment paper with overhang to easily lift the bars out of the pan. Be sure to spray the paper with nonstick cooking spray before adding the first layer of cookie dough.
Better Than Anything Bars: Decadent Dessert!
Craving the ultimate dessert? These Better Than Anything Bars are layers of caramel, peanut butter, and chocolatey goodness! Get the easy recipe now!
🍎 Nutrition Information
🥘 Ingredients
👨🍳 Instructions
-
Preheat your oven to 375°F (190°C).
-
Generously spray a 9″x13″ baking pan with non-stick cooking spray or line the pan with parchment paper, leaving an overhang on the sides for easy removal.
-
In a mixing bowl, add the softened butter, brown sugar, and white sugar.
-
Beat the ingredients together on medium-high speed until the mixture is light, fluffy, and fully combined.
-
Beat in the eggs one at a time, mixing well after each addition.
-
Once the eggs are incorporated, add the vanilla extract and mix until the dough comes together.
-
In a separate bowl, whisk together the flour, baking soda, and salt.
-
Gradually add the dry ingredients to the wet ingredients, mixing until just combined.
-
Fold in the chocolate chips by hand or using your mixer on low speed.
-
Place half of the cookie dough into the prepared baking pan.
-
Spread it out evenly to form the first layer using your fingers or the back of a spoon.
-
Bake in the preheated oven for 8-10 minutes or until it’s just set and lightly golden around the edges.
-
While the dough is baking, prepare the caramel sauce.
-
In a microwave-safe bowl, combine the unwrapped caramels and evaporated milk.
-
Microwave the mixture on power level 5 for 1-2 minutes, stirring every 30 seconds, until the caramels are melted and fully combined with the milk.
-
Once the caramel is smooth, stir in the peanut butter until completely incorporated.
-
Once the first layer of cookie dough is baked, remove the pan from the oven.
-
Carefully pour the prepared caramel sauce over the cookie layer, spreading it evenly with a spatula.
-
Drop the remaining dough by teaspoonfuls on top of the caramel layer.
-
Return the pan to the oven and bake for an additional 17-20 minutes, or until the cookie dough is golden brown and the caramel is bubbling.
-
Allow the bars to cool completely in the pan before slicing.
-
Once cooled, use a sharp knife to cut the bars into squares. Use a warm knife for cleaner cuts.
📝 Notes & Tips
Use real, high-quality butter. Soften the butter properly. Don’t overmix the dough. Use individually wrapped caramels. Experiment with different types of chocolate chips. A pinch of sea salt sprinkled on top after baking enhances all the other flavors. Let the bars cool completely before slicing. Line the pan with parchment paper with overhang to easily lift the bars out of the pan. Be sure to spray the paper with nonstick cooking spray before adding the first layer of cookie dough. Store in an airtight container at room temperature, in the refrigerator, or in the freezer. Variations: Use dark chocolate chips, white chocolate chips, peanut butter chips, almond butter, sunflower butter, caramel bits, homemade caramel, chopped pecans, walnuts, or almonds, colorful sprinkles, crushed pretzels, or instant coffee powder.
Essential Ingredients: What Makes Each One Special
Let’s break down the ingredients and why each one is crucial for achieving better than anything bars perfection.
- Butter: As I mentioned earlier, high-quality butter is a must. It provides richness, flavor, and the perfect texture to the cookie base. I prefer unsalted butter so I can control the amount of salt in the recipe.
- Sugars: Brown sugar adds a caramel-like depth and moisture to the bars, while white sugar provides sweetness and helps with browning. The combination of both creates the perfect balance of flavor.
- Eggs: Eggs bind the ingredients together and add richness to the dough. Use large eggs for best results.
- Vanilla Extract: Vanilla extract enhances the other flavors and adds a touch of warmth to the bars. Use pure vanilla extract, not imitation.
- All-Purpose Flour: All-purpose flour is the base of the cookie dough. Be sure to measure it accurately for best results.
- Baking Soda: Baking soda helps the bars rise and become light and airy.
- Salt: Salt enhances the sweetness of the bars and balances out the flavors.
- Milk Chocolate Chips: Milk chocolate chips add a touch of sweetness and chocolatey goodness to the bars. Feel free to experiment with different types of chocolate chips.
- Caramels: Individually wrapped caramels melt more evenly than caramel squares. Use a high-quality brand for best results.
- Evaporated Milk: Evaporated milk adds creaminess to the caramel sauce and helps it melt smoothly.
- Peanut Butter: Peanut butter adds a nutty, savory element to the caramel layer. Use creamy peanut butter for best results.
Each of these ingredients plays a vital role in the overall flavor and texture of these incredible better than anything bars. Using high-quality ingredients will elevate this simple baking recipe into something truly special.
Step-by-Step Mastery: Pro Techniques for Success
Ready to dive into the detailed instructions? Follow these steps carefully, and you’ll be rewarded with the most delicious better than anything bars you’ve ever tasted. I’ve broken down each step with extra tips and insights to ensure your success.
- Preheat and Prep: Preheat your oven to 375°F (190°C). This is crucial for even baking. Generously spray a 9″x13″ baking pan with non-stick cooking spray. This will prevent the bars from sticking and make them easy to remove. You can also line the pan with parchment paper, leaving an overhang on the sides for easy removal.
- Cream the Butter and Sugars: In a mixing bowl, add the softened butter, brown sugar, and white sugar. Beat the ingredients together on medium-high speed until the mixture is light, fluffy, and fully combined. This process, called creaming, incorporates air into the mixture, resulting in a tender cookie base.
- Add Eggs and Vanilla: Beat in the eggs one at a time, mixing well after each addition. Once the eggs are incorporated, add the vanilla extract and mix until the dough comes together. Be careful not to overmix at this stage. Overmixing can lead to tough bars.
- Combine Dry Ingredients: In a separate bowl, whisk together the flour, baking soda, and salt. Whisking ensures that the dry ingredients are evenly distributed, preventing clumps in the final product.
- Incorporate Dry into Wet: Gradually add the dry ingredients to the wet ingredients, mixing until just combined. Again, be careful not to overmix. The dough should be thick and slightly sticky.
- Stir in Chocolate Chips: Fold in the chocolate chips by hand or using your mixer on low speed. This prevents the chocolate chips from breaking apart.
- Bake the First Layer: Place half of the cookie dough into the prepared baking pan. Spread it out evenly to form the first layer. You can use your fingers or the back of a spoon to do this. Bake in the preheated oven for 8-10 minutes or until it’s just set and lightly golden around the edges. You want the first layer to be firm enough to support the caramel layer.
- Prepare the Caramel Mixture: While the dough is baking, prepare the caramel sauce. In a microwave-safe bowl, combine the unwrapped caramels and evaporated milk. Microwave the mixture on power level 5 for 1-2 minutes, stirring every 30 seconds, until the caramels are melted and fully combined with the milk. Using power level 5 prevents the caramel from burning.
- Add Peanut Butter: Once the caramel is smooth, stir in the peanut butter until completely incorporated. The mixture should be creamy and smooth.
- Layer the Caramel Sauce: Once the first layer of cookie dough is baked, remove the pan from the oven. Carefully pour the prepared caramel sauce over the cookie layer, spreading it evenly with a spatula. Be sure to cover the entire surface of the cookie layer.
- Add the Second Layer of Dough: Drop the remaining dough by teaspoonfuls on top of the caramel layer. It doesn’t need to cover the caramel completely. The dough will spread as it bakes.
- Bake the Assembled Bars: Return the pan to the oven and bake for an additional 17-20 minutes, or until the cookie dough is golden brown and the caramel is bubbling. The edges of the dough should be firm, while the center remains soft and chewy.
- Cool and Slice: Allow the bars to cool completely in the pan before slicing. This is crucial for clean cuts and prevents the caramel from oozing everywhere. Once cooled, use a sharp knife to cut the bars into squares. I like to use a warm knife for cleaner cuts.
Follow these steps, and you’ll be well on your way to creating better than anything bars that will blow everyone away! And remember, baking is a science, but it’s also an art. Don’t be afraid to experiment and put your own personal touch on these incredible dessert bars.
Creative Variations: Make It Your Own
The beauty of these better than anything bars is that they’re incredibly versatile. Feel free to experiment and put your own spin on them! Here are a few ideas to get you started:
- Chocolate Chips: You can experiment with different types of chocolate chips—dark chocolate chips for a richer flavor, white chocolate chips for a sweeter flavor, or even peanut butter chips for an extra dose of peanut butter goodness. Or swirl in two different chocolate chips.
- Peanut Butter: If you prefer a nut-free version, almond butter or sunflower butter can be used in place of peanut butter. You can also use different flavors of peanut butter, such as chocolate peanut butter or honey peanut butter.
- Caramel: If you can’t find individually wrapped caramels, caramel bits or even homemade caramel can work just as well. Homemade caramel will elevate these caramel bars into something truly special.
- Adding Nuts: For an added crunch, consider stirring in some chopped pecans, walnuts, or almonds into the cookie dough or sprinkling them on top before baking. Roasted nuts will add even more flavor and texture.
- Sprinkles: Add a festive touch by sprinkling the bars with colorful sprinkles before baking. This is a great way to customize them for different holidays or occasions.
- Pretzels: For a salty-sweet twist, crush some pretzels and sprinkle them on top of the caramel layer before adding the second layer of dough.
- Coffee: Add a teaspoon of instant coffee powder to the caramel mixture for a mocha-flavored twist.
These are just a few ideas to get you started. The possibilities are endless! Don’t be afraid to get creative and make these chocolate peanut butter bars your own. I’m sure you’ll come up with some amazing variations that will become family favorites. Remember, at RecipesWithClara, we believe that baking should be fun and creative. So, go ahead and experiment! These will truly be better than anything bars that you make and customize yourself.
Perfect Pairings: What to Serve With Better Than Anything Bars
These better than anything bars are delicious on their own, but they’re even better when paired with the right accompaniments. Here are a few ideas:
- Ice Cream: A scoop of vanilla ice cream or chocolate ice cream is the perfect complement to these rich, decadent bars.
- Whipped Cream: A dollop of whipped cream adds a light and airy touch.
- Coffee: A cup of hot coffee or iced coffee is the perfect pick-me-up to enjoy with these bars.
- Milk: A glass of cold milk is a classic pairing that never disappoints.
- Fruit: A side of fresh berries or sliced bananas adds a touch of freshness and balances out the sweetness of the bars.
- Hot Fudge Sauce: Drizzle hot fudge sauce over the bars for an extra dose of chocolatey goodness.
No matter what you choose to serve with these dessert bars, they’re sure to be a hit! These bars are the perfect treat for any occasion, from casual get-togethers to elegant dinner parties. They are truly better than anything bars and will have your family and friends wanting more. They pair well with your favorite Netflix series, or just enjoying a quiet moment.
Storage Secrets: Keep It Fresh and Delicious
Want to keep your better than anything bars fresh and delicious for as long as possible? Here are a few storage tips:
- Airtight Container: Store the bars in an airtight container at room temperature. This will prevent them from drying out.
- Refrigerator: For longer storage, store the bars in the refrigerator. They will keep for up to a week.
- Freezer: For even longer storage, wrap the bars individually in plastic wrap and store them in the freezer. They will keep for up to 3 months.
- Layering: When storing the bars in a container, layer them between sheets of parchment paper to prevent them from sticking together.
With proper storage, you can enjoy these caramel bars for days (or even weeks!) to come. However, I doubt they’ll last that long! These better than anything bars are so irresistible that they tend to disappear quickly. At RecipesWithClara, we believe in making the most of every delicious bite. So, store them properly and savor every moment of indulgence.
Health Benefits: Why This Better Than Anything Bars is Good for You
Okay, let’s be honest: these better than anything bars aren’t exactly a health food. They’re a decadent dessert, meant to be enjoyed in moderation. However, they do contain some ingredients that offer certain health benefits:
- Chocolate: Dark chocolate is rich in antioxidants, which can help protect your cells from damage.
- Peanuts: Peanuts are a good source of protein, fiber, and healthy fats.
- Dairy: Dairy products like butter and evaporated milk provide calcium, which is essential for strong bones and teeth.
Of course, it’s important to remember that moderation is key. Enjoy these chocolate peanut butter bars as part of a balanced diet and a healthy lifestyle. While not a health food, these better than anything bars are good for the soul. Indulging in a sweet treat can boost your mood, reduce stress, and bring a little joy to your day. So, go ahead and enjoy a bar (or two!) without guilt. These treats are a reminder that life is about balance and finding pleasure in the simple things. And after all, isn’t a happy soul a healthy soul? Also, check out my other great recipes for more ideas at recipeswithclara.com.
Troubleshooting: Fix Common Mistakes
Even with the best recipe, mistakes can happen. Here are some common problems you might encounter when making better than anything bars and how to fix them:
- Bars are too dry: This could be due to overbaking or using too much flour. Be sure to measure your flour accurately and don’t overbake the bars.
- Bars are too gooey: This could be due to underbaking or using too much caramel sauce. Bake the bars until the cookie dough is golden brown and the caramel is bubbling.
- Caramel is too hard: This could be due to overcooking the caramel sauce. Be sure to microwave the caramel mixture on power level 5 and stir it frequently.
- Bars are sticking to the pan: Be sure to grease the pan generously with non-stick cooking spray or line it with parchment paper.
- Dough is too crumbly: This could be due to not enough liquid in the dough or not creaming the butter and sugar enough. Add a tablespoon or two of milk to the dough if it’s too crumbly. Make sure your butter is also softened properly before creaming it with the sugars.
Don’t let these potential problems discourage you! With a little patience and practice, you’ll be making perfect better than anything bars in no time. And remember, even if your bars aren’t perfect, they’ll still be delicious! Embrace the imperfections and enjoy the process of baking these incredible dessert bars.
Expert Answers: Your Burning Questions
Still have questions about making better than anything bars? Here are some frequently asked questions and their answers:
- Can I use a different type of chocolate chip? Absolutely! Feel free to experiment with different types of chocolate chips, such as dark chocolate, semi-sweet, or white chocolate.
- Can I use a different type of nut butter? Yes, you can use almond butter, sunflower butter, or any other nut butter in place of peanut butter.
- Can I make these bars gluten-free? Yes, you can substitute gluten-free all-purpose flour for regular all-purpose flour.
- Can I make these bars vegan? It’s a bit more challenging, but you can try using vegan butter, vegan chocolate chips, and a flax egg (1 tablespoon of ground flaxseed mixed with 3 tablespoons of water) in place of the eggs. You’ll also need to find vegan caramels.
- How long do these bars last? These bars will last for up to a week at room temperature or in the refrigerator, or up to 3 months in the freezer.
I hope these answers have been helpful! If you have any other questions, feel free to leave a comment below. I’m always happy to help. Here at RecipesWithClara, we want to empower you to become a confident and successful baker. So, don’t hesitate to reach out with any questions or concerns. And remember, the most important ingredient is love. Bake these better than anything bars with love, and they’re sure to be a hit! These really are the better than anything bars you can make!
And if you need more inspiration, here are some related RecipesWithClara recipes to keep you baking:
- Chewy Chocolate Chip Cookie Bars: A Classic Treat Perfected
- Irresistible Peanut Butter Blondies: The Ultimate Sweet and Salty Dessert
- Decadent Salted Caramel Brownies: A Sweet and Salty Delight
- Easy Fudge Recipe: A Simple Indulgence for Chocolate Lovers
- Classic No-Bake Cookies: A Quick and Easy Treat for Any Occasion
- Tangy Lemon Bars: A Refreshing and Zesty Dessert
Give them all a try and let me know what you think!
More Amazing Recipes You’ll Love
If you loved these better than anything bars, then you’re in the right place! RecipesWithClara is all about creating delicious, easy-to-follow recipes that bring joy to your kitchen and smiles to your loved ones’ faces. From classic desserts to savory dishes, we’ve got something for everyone. So, before you go, be sure to check out some of our other amazing recipes, and don’t forget to subscribe to our newsletter for the latest updates and exclusive content. Follow us on social media to see what we’re cooking up in the RecipesWithClara kitchen every day. And most importantly, keep baking! Baking is more than just a hobby; it’s a way to connect with others, express your creativity, and create memories that will last a lifetime. These better than anything bars are just the beginning. There’s a whole world of deliciousness waiting to be explored. I’m so excited to continue sharing my passion for baking with you. So, grab your apron, preheat your oven, and let’s get baking!
Don’t forget to share these better than anything bars with your friends and family. They will truly be amazed. Be sure to tell them you got the recipe from RecipesWithClara. And happy baking! I hope you enjoy these better than anything bars.
If you made these, be sure to tag us on social media @RecipesWithClara. I can’t wait to see them!